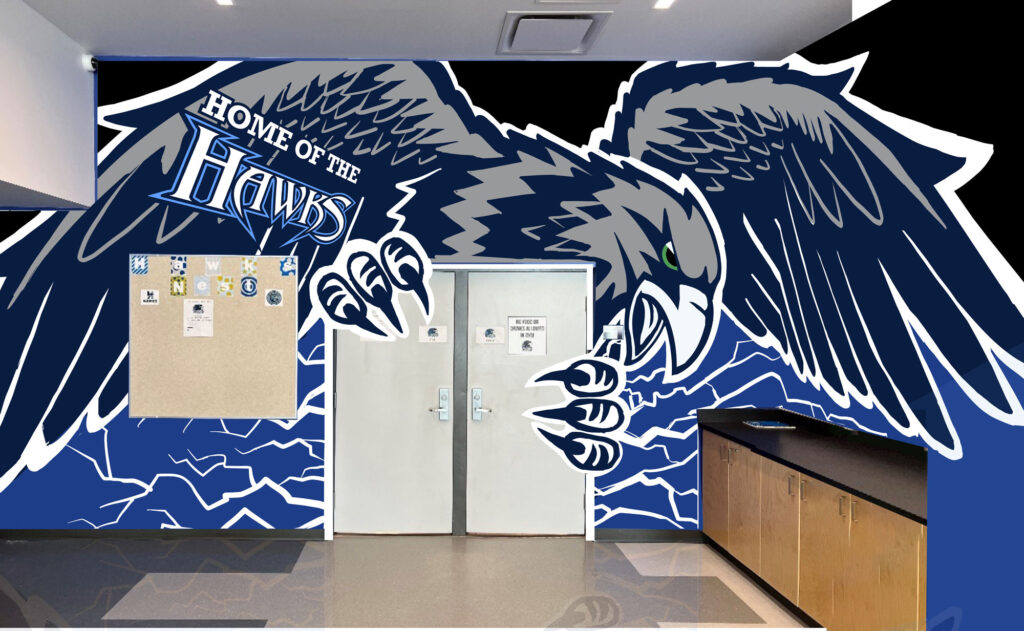
A dynamic, graphic mural that greets visitors to the school around the gym doors.
I had such a great time collaborating with the staff at Calmar Secondary School. If you know any schools looking for mural creation like this, please contact me via my contact form. I’d love to collaborate with them.
Here you can see the digital mock up sitting over top of the doodle grid that I created in the space. This gives me the landmarks I need in order to build out the composition in the context of the space.
Here is the digital mockup that I created using photoshop and adobe fresco.
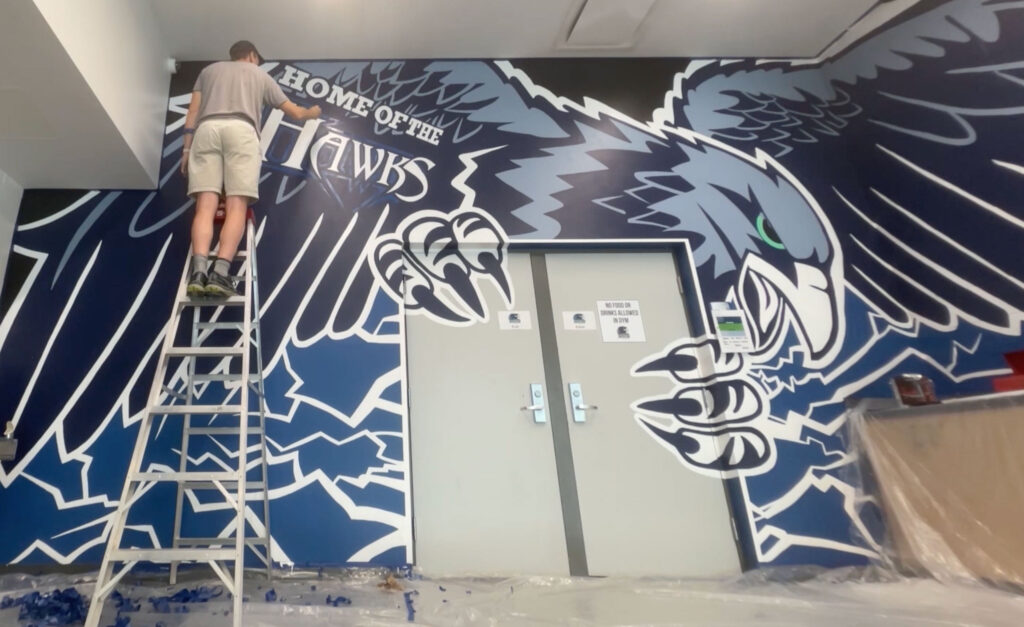
Here is the mural nearing completion. you can see in this shot how I overlapped the claws on the door jam. The text was a challenge, need to use painters tape and few other tricks to get it right. It was such a pleasure to work on this piece for Calmar Secondary School.
Mural Process
Mural creation is one of my favourite creative endeavours. I haven’t met a mural yet that didn’t push me in some way.
Consultation/contracts/scouting – Murals are collaborative by nature. They require a public space to work on. Whether it be some old utility trailers, a wall in an office or school, or a large cinderblock wall on the side of a building – each one of these spaces comes with the start of a collaboration between the client and the artist. The initial stages of a mural project include a lot of communication, visits to the space, discussion of surface preparation and contracts that meet the needs of both parties including considerations for safety.
Artistic Direction – Before a concept is built, the direction must be set. This can be a dialogue or it can be set by the artist. It depends on the client and their level of interest in the creative direction of the work. More often than not they are hiring the muralist based on their body of work, so it’s likely they would be creating something similar to their existing work.
Sketches and Mockups – The great thing about modern day creative endeavours is that you can easily mockup mural concept and display them in the context of the location through photoshop or another photo editing software.
Art Transfer – Ttransfering the sketch to the final surface can be done in a few ways. A projector can be used and the image traced, a loose doodle grid can be used or a program like Mural Maker from Da Vinci Eye.
Paint it up! – One does not just simply paint a mural. It may require a variety of tools and equipment to complete a mural. Lifts, sprayers, scaffolding, brushes and lots of water. (If you’re working in +30 degree weather.)
Seal it – It’s always a good idea to seal a mural in an anti-graffiti coating or sealer of some kind depending on the application and location.